React类组件
React类组件的概念与函数组件一致,但类组件可以提供state机制。通过state机制组件可以动态更新视图内容。在类组件中还可以使用声明周期函数,对组件使用的资源做更加精细的控制。
定义类组件
在React中,使用ES6的Class语法定义一个类组件。
//引入React框架
import React from 'react'

//类组件是由继承与React.Component基类构建
class Welcome extends React.Component {

    //通过类中的render方法,返回一个React元素
    render(){
        return(
            <h1>{'Hello'}</h1>
        )
    }
}
类组件的渲染与函数组件一样:
const e = <Welcome />
类组件在定义是,同样可以使用属性:
//引入React框架
import React from 'react'

//类组件是由继承与React.Component基类构建
class Welcome extends React.Component {

    //通过类中的render方法,返回一个React元素
    render(){
        return(
            <h1>{`Hello, ${this.props.name}`}</h1>
        )
    }
}
在类组件中,通过this对象访问其自身props属性对象。
通过类组件构造React元素时,也可以为其指定属性赋值:
const e = <Welcome name={'Tom'} />
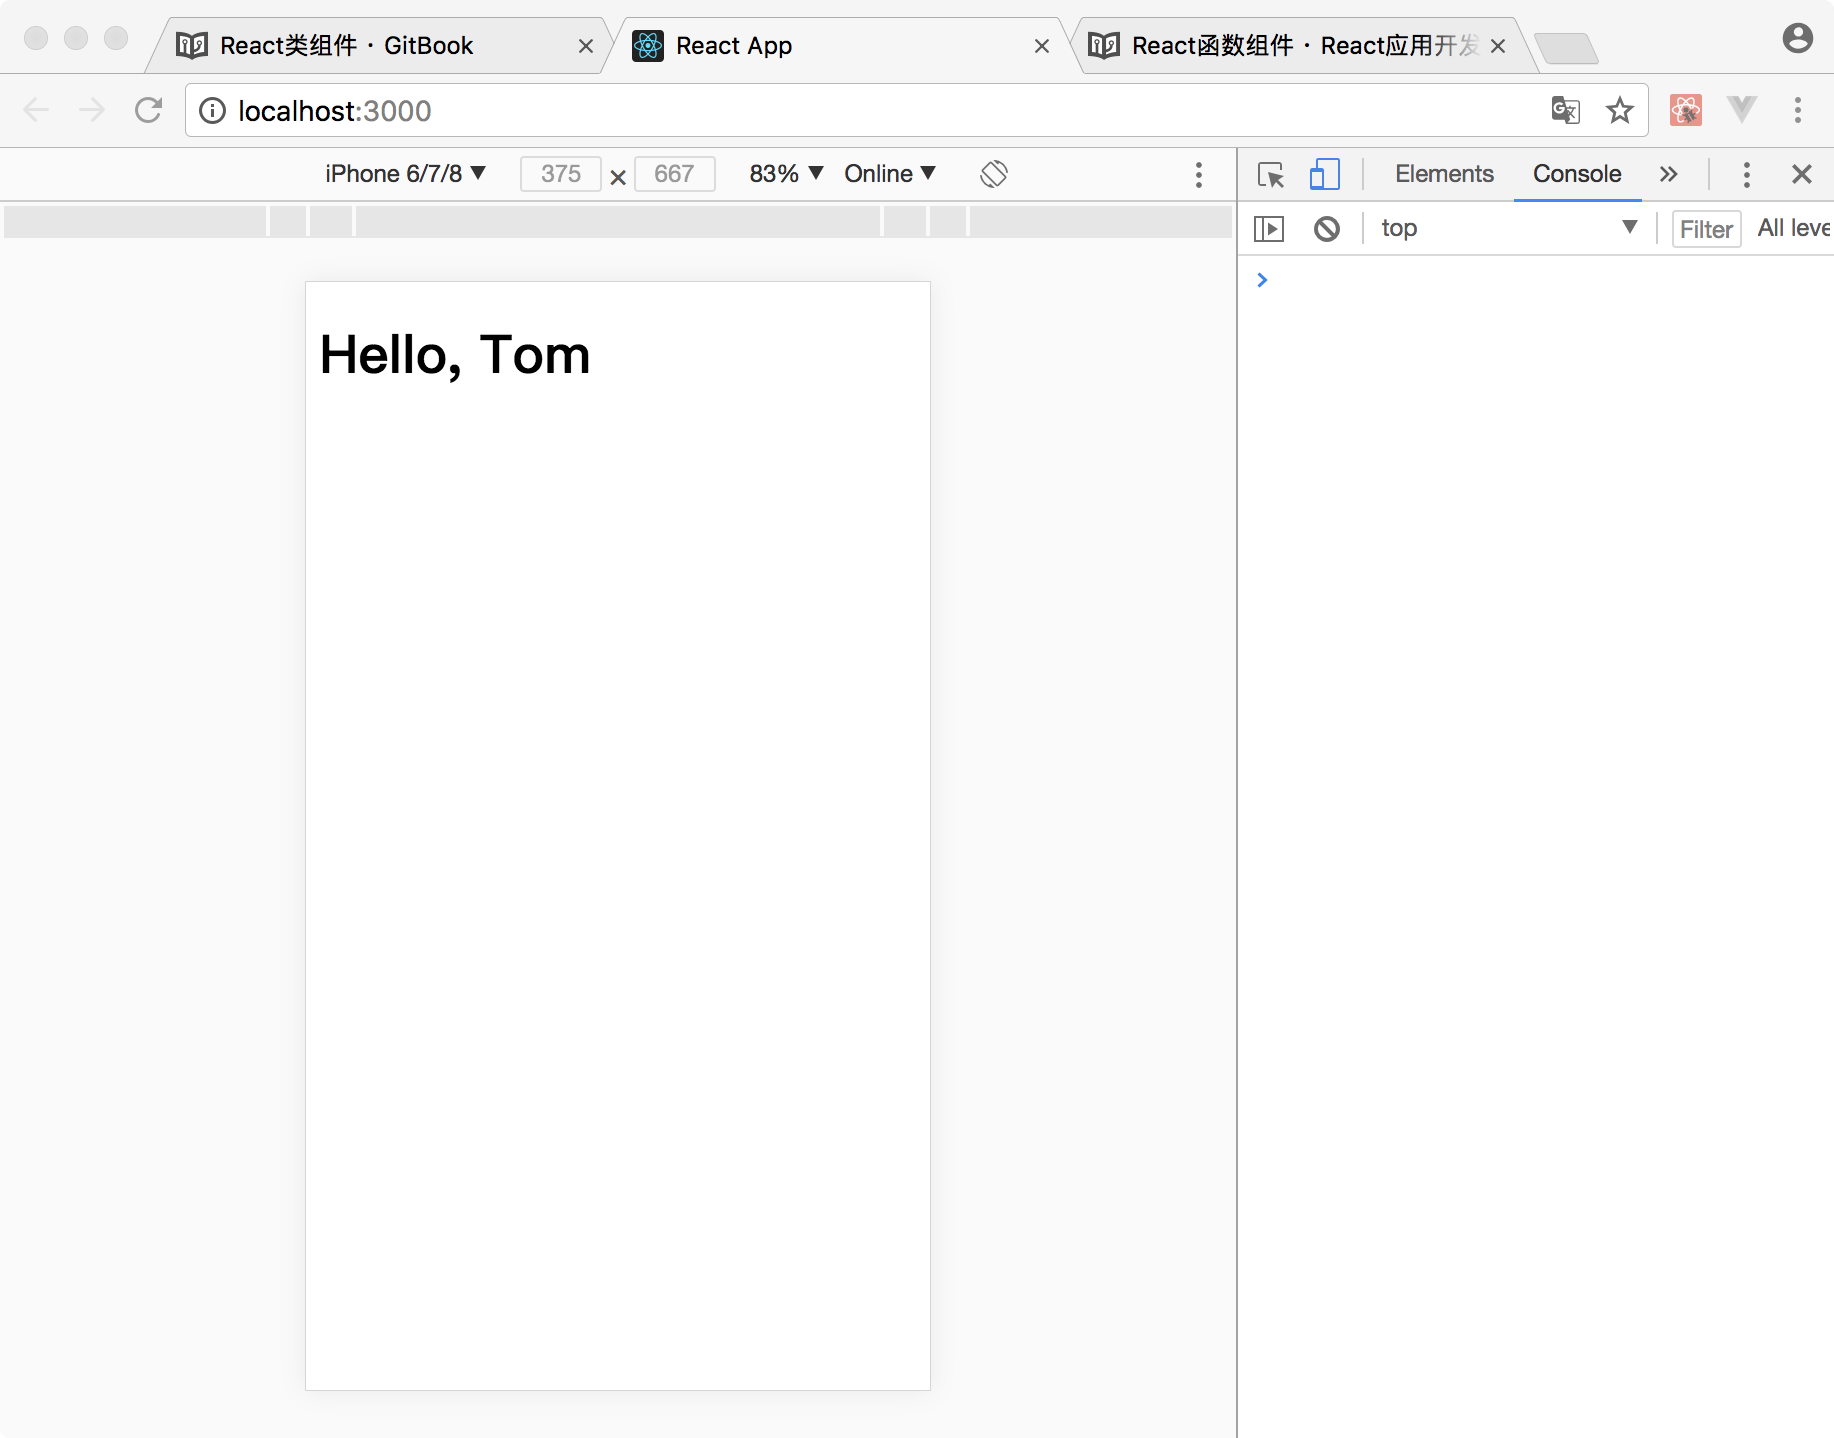
完整代码如下:
//引入React框架
import React from 'react';

//引入ReactDOM框架
import ReactDOM from 'react-dom';

//使用JavaScriptDOM操作函数,通过id获取容器div
const div = document.getElementById('root');

//类组件是由继承与React.Component基类构建
class Welcome extends React.Component {

    //通过类中的render方法,返回一个React元素
    render(){
        return(
            <h1>{`Hello, ${this.props.name}`}</h1>
        )
    }
}

const e = <Welcome name={'Tom'} />

ReactDOM.render(e,div);
运行效果:
组件状态
在类组件定义中,可以为组件添加一个状态对象,通过对状态的操作,可以动态更新页面内容。
对于状态有以下三种操作:
- 初始化状态
- 使用状态
- 动态维护状态
React规定所有需要动态更新的内容,都需要给定一个初始值,即为状态初始化操作。状态初始化操作在类的构造方法内进行。使用React.Component基类提供的state属性,将状态初值以键值对的方式存入该属性中。
constructor(props){
    super(props);

    //状态初始化
    this.state = {
        a:0,
    }
}
在构造React元素时,可以直接使用初始化后的状态值,该值从this.state属性中获取。
render(){
    return(
        <h1>{this.state.a}</h1>
    )
}
当a有一个新值需要在页面上显示时,需要使用this.setState()方法对state中的a值进行修改。
onSomeEvnet(){

    //构建一个新的对象,储存状态的新值
    const newState = {
        a:1,
    }
    //使用this.setState()更新state值
    this.setState(newState);
}
注意不能直接修改state的值,因在React框架中,无法直接监控state属性值的变化,需要使用组件的setStateAPI告知框架,state值发生变化。在框架得知状态发生变化之后,会重新调用此组件的render()方法,生成新的React元素,并用新的React元素替换掉旧元素,以实现页面内容的刷新。
所以下面的错误代码是不会触发视图刷新操作:
onSomeEvnet(){
    //错误操作!!!
    this.state.a = 1;
}
在更新状态值时,通常会遇到一类场景,即更新值是基于上一次状态的值的内容。
例如状态值自增一操作。在更新状态值时,需要获知上一次状态的具体内容。在此种情况下,React为我们提供了一个异步更新的机制:为setState()提供一个函数参数,该函数参数携带上一次状态值的对象,通过此函数参数返回新的状态对象即可。
onSomeEvnet(){

    this.setState((preState)=>{
        a:preState.a+1,
    })
}
以上代码即可完成基于上一次状态值的更新操作。
接下来我们使用一个自动计数器来讲解state的使用方法。这个自动计数器可以每一秒钟自动实施+1操作,初始值为0.
使用state时,首先需要在constructor()方法中,声明state对象属性。将需要动态更新的字段初值以键值对方式放入该对象中。
class AutoCounter extends React.Component{

    //props是React.Component内置的属性,在React.Component子类中实现constructor()方法时,必须定义此形参
    constructor(props){
        //需要使用super将props对象传入父类进行初始化操作
        super(props);

        //声明state属性,其值为对象,通过键值对方式存储需要动态更新的内容
        this.state = {
            count:0,
        }
    }

    render(){

        //在render()中,使用this.state中的值构建React元素,以实现动态刷新内容
        return(
            <h1>{this.state.count}<h1>
        )
    }

}
此时通过AutoCounter构建的React元素还无法进行自动增加,只是一个静态元素。我们使用定时器来实现计数器的自增功能。
在constructor()方法中初始化一个定时器,让其每一秒钟将state中的count值+1。
class AutoCounter extends React.Component{
//props是React.Component内置的属性,在React.Component子类中实现constructor()方法时,必须定义此形参
constructor(props){
    //需要使用super将props对象传入父类进行初始化操作
    super(props);

    //声明state属性,其值为对象,通过键值对方式存储需要动态更新的内容
    this.state = {
        count:0,
    }

    //配置定时器,触发时间间隔为1000毫秒
    setInterval(()=>{
        //触发操作为state.count+1
        this.setState((preState)=>{
            return {
                count:preState.count+1,
            }
        })
    },1000)
}

render(){

    //在render()中,使用this.state中的值构建React元素,以实现动态刷新内容
    return(
        <h1>{this.state.count}</h1>
    )
}
}
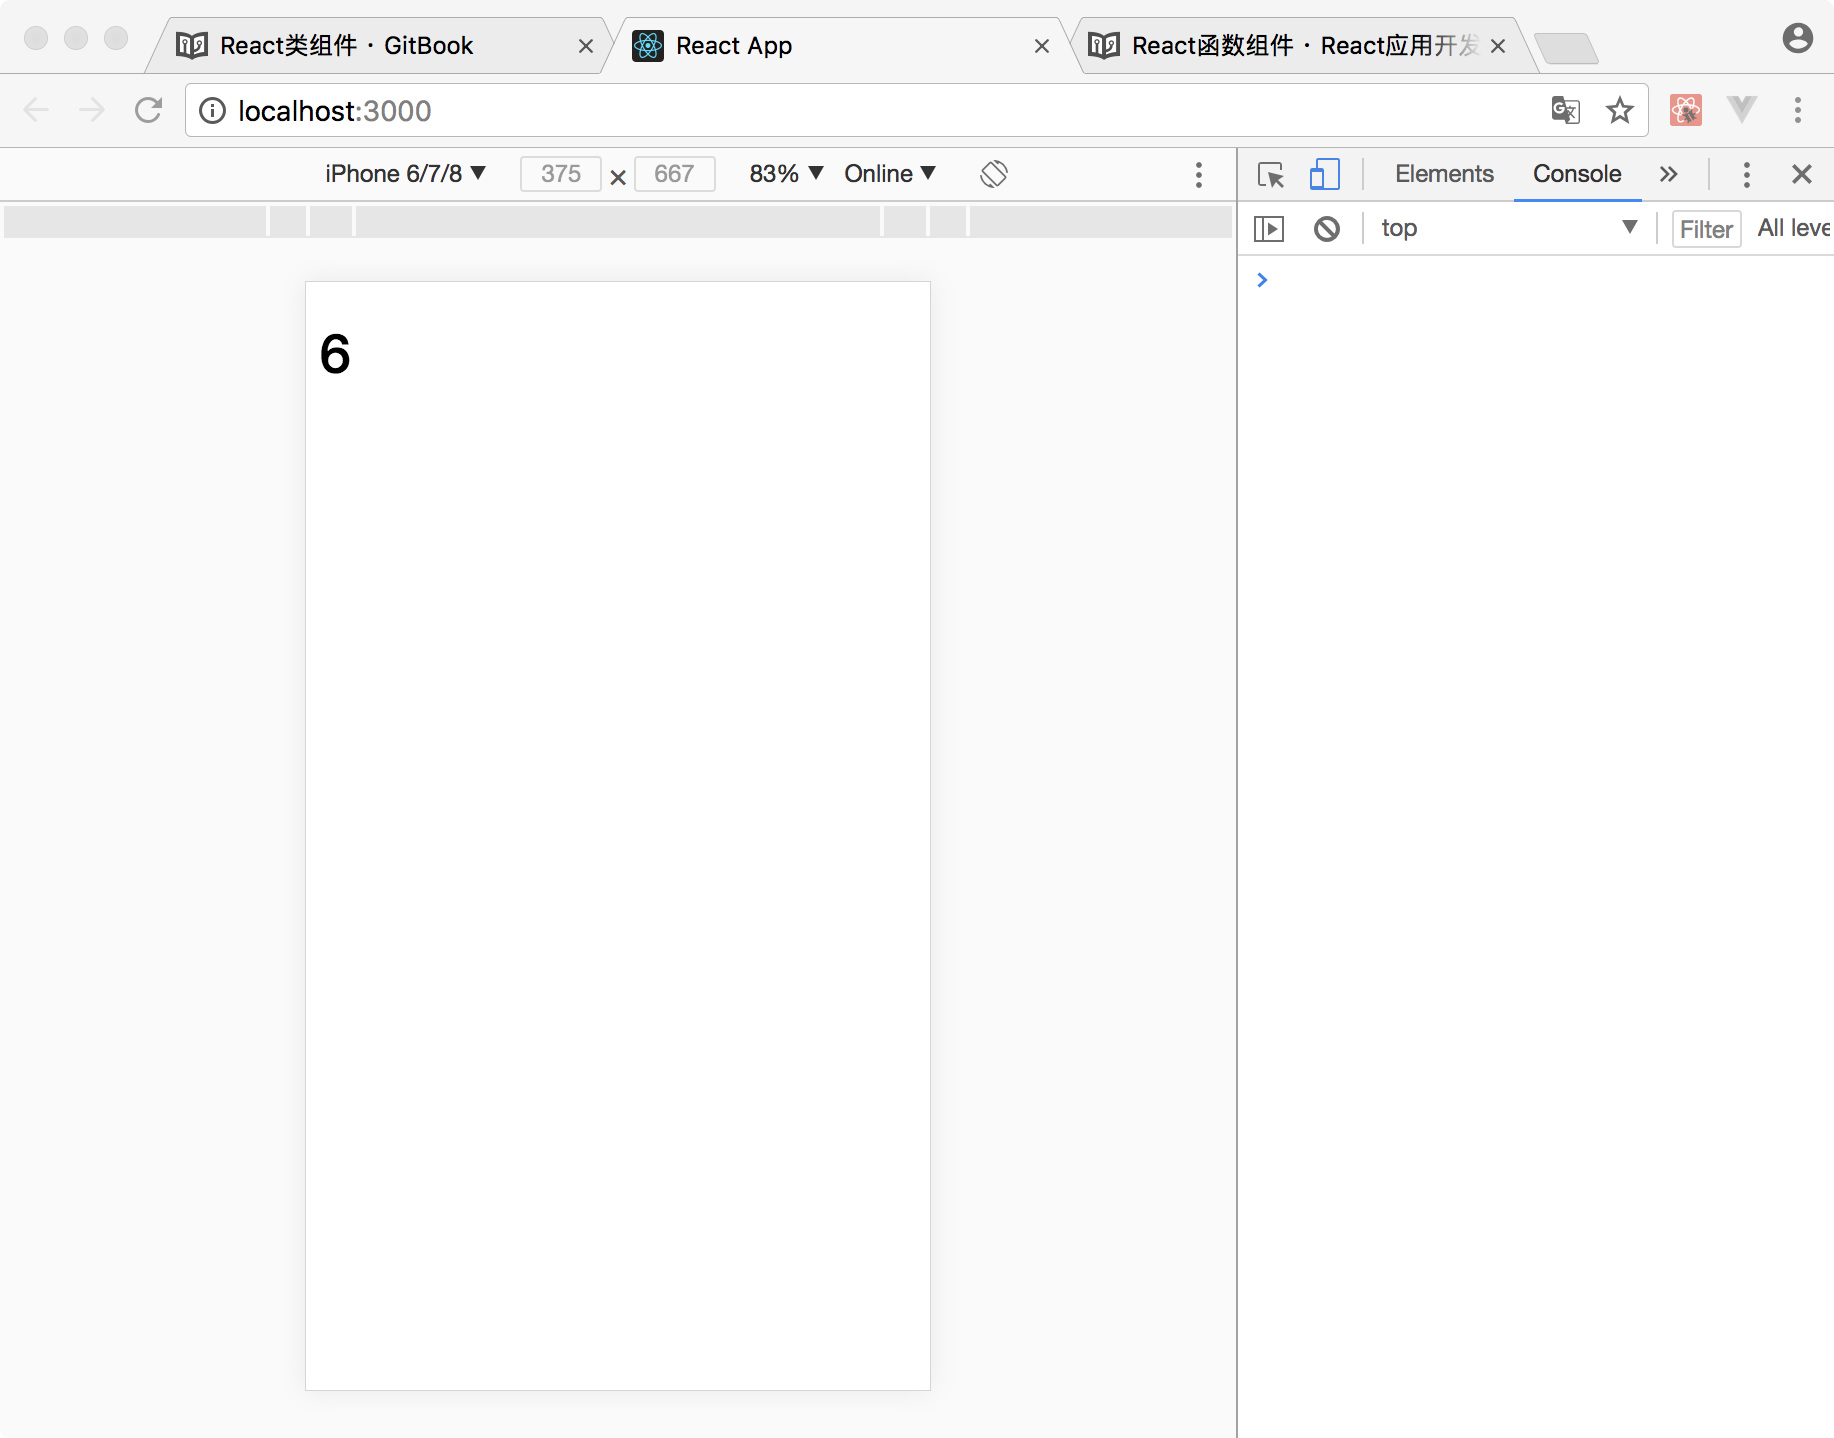
完整代码:
//引入React框架
import React from 'react';

//引入ReactDOM框架
import ReactDOM from 'react-dom';

//使用JavaScriptDOM操作函数,通过id获取容器div
const div = document.getElementById('root');

class AutoCounter extends React.Component{

        //props是React.Component内置的属性,在React.Component子类中实现constructor()方法时,必须定义此形参
        constructor(props){
            //需要使用super将props对象传入父类进行初始化操作
            super(props);

            //声明state属性,其值为对象,通过键值对方式存储需要动态更新的内容
            this.state = {
                count:0,
            }

            //配置定时器,触发时间间隔为1000毫秒
            setInterval(()=>{
                //触发操作为state.count+1
                this.setState((preState)=>{
                    return {
                        count:preState.count+1,
                    }
                })
            },1000)
        }

        render(){

            //在render()中,使用this.state中的值构建React元素,以实现动态刷新内容
            return(
                <h1>{this.state.count}</h1>
            )
        }

    }

ReactDOM.render(<AutoCounter/>,div);
运行结果:
生命周期函数
在具有许多组件的应用程序中,在销毁时释放组件所占用的资源非常重要。上一小节中使用的定时器资源应该按照需求申请,在不再使用时进行释放操作。
对资源进行精细化管理需要一个准确的声明周期,告诉我们当前组件的状态。
常用的声明周期函数有4个:
- constructor()
- componentDidMount()
- render()
- componentWillUnmount()
组件在内存中进行初始化操作时,constructor()会被调用。在此方法中首先需要调用super(props)对父类实例进行构造。然后对状态进行初始化操作。在此方法中,一般不会申请系统资源。因此方法被调用时,通过该组件构造的元素只在内存中存在,还没有显示在页面上,此时调用响应的资源,用户并不会看到响应的效果,但CPU的占用率仍然会提高。
通过该组件构造的元素已经挂载到屏幕上时,componentDidMount()方法会被调用。当元素被从屏幕上卸载时componentWillUnmount()方法会被调用。一个元素可能会被挂载和卸载多次重复,所以,这两个方法可能会被调用多次。我们通过在componentDidMount()方法中申请系统资源,例如Timer等,在componentWillUnmount()方法释放资源,以实现对资源的精细化管理。
render()方法会在元素挂载的屏幕上之前调用,通过在state或props的值发生变化时也会被触发,生成一个新的元素。
现在我们使用声明周期对上小节中的自动计数器进行改造,以实现对定时器资源的精细化管理。
首先我们在componentDidMount()方法中申请一个定时器资源,并通过属性保存其资源ID,为销毁做准备
componentDidMount(){
    this.timerID = setInterval(()=>{},1000)
}
然后在componentWillUnmount()方法释放定时器资源:
componentWillUnmount(){
    clearInterval(this.timerID)
}
这样便可以在该元素不在屏幕上显示时释放相应资源。
完整代码:
//引入React框架
import React from 'react';

//引入ReactDOM框架
import ReactDOM from 'react-dom';

//使用JavaScriptDOM操作函数,通过id获取容器div
const div = document.getElementById('root');

class AutoCounter extends React.Component {

    //props是React.Component内置的属性,在React.Component子类中实现constructor()方法时,必须定义此形参
    constructor(props) {
        //需要使用super将props对象传入父类进行初始化操作
        super(props);

        //声明state属性,其值为对象,通过键值对方式存储需要动态更新的内容
        this.state = {
            count: 0,
        }


    }

    render() {

        //在render()中,使用this.state中的值构建React元素,以实现动态刷新内容
        return (
            <h1>{this.state.count}</h1>
        )
    }

    componentDidMount() {
        this.timerID = setInterval(() => {
            //触发操作为state.count+1
            this.setState((preState) => {
                return {
                    count: preState.count + 1,
                }
            })
        }, 1000)
    }

    componentWillUnmount() {
        clearInterval(this.timerID)
    }

}

ReactDOM.render(<AutoCounter />, div);
属性验证
在定义React组件时,需要使用外界注入的属性值来构建本身的Reac元素。React框架提供了一个属性检查的机制,该机制在开发模式下,可以对外界注入的属性进行动态检查,以避免出现bug。
PropTypes 包含一整套验证器,可用于确保你接收的数据是有效的。以下代码演示了PropTypes基本使用方法:
//引入PropTypes
import PropTypes from 'prop-types';

class Welcome extends React.Component {
  render() {
    return (
      <h1>Hello, {this.props.name}</h1>
    );
  }
}

//通过对Welcome的静态属性propTypes赋值,开启属性检查功能个
Welcome.propTypes = {
  name: PropTypes.string
};
PropTypes提供了以下可以直接使用的验证器:
import PropTypes from 'prop-types';

MyComponent.propTypes = {
  // 你可以将属性声明为以下 JS 原生类型
  optionalArray: PropTypes.array,
  optionalBool: PropTypes.bool,
  optionalFunc: PropTypes.func,
  optionalNumber: PropTypes.number,
  optionalObject: PropTypes.object,
  optionalString: PropTypes.string,
  optionalSymbol: PropTypes.symbol,

  // 任何可被渲染的元素(包括数字、字符串、子元素或数组)。
  optionalNode: PropTypes.node,

  // 一个 React 元素
  optionalElement: PropTypes.element,

  // 你也可以声明属性为某个类的实例,这里使用 JS 的
  // instanceof 操作符实现。
  optionalMessage: PropTypes.instanceOf(Message),

  // 你也可以限制你的属性值是某个特定值之一
  optionalEnum: PropTypes.oneOf(['News', 'Photos']),

  // 限制它为列举类型之一的对象
  optionalUnion: PropTypes.oneOfType([
    PropTypes.string,
    PropTypes.number,
    PropTypes.instanceOf(Message)
  ]),

  // 一个指定元素类型的数组
  optionalArrayOf: PropTypes.arrayOf(PropTypes.number),

  // 一个指定类型的对象
  optionalObjectOf: PropTypes.objectOf(PropTypes.number),

  // 一个指定属性及其类型的对象
  optionalObjectWithShape: PropTypes.shape({
    color: PropTypes.string,
    fontSize: PropTypes.number
  }),

  // 你也可以在任何 PropTypes 属性后面加上 `isRequired`
  // 后缀,这样如果这个属性父组件没有提供时,会打印警告信息
  requiredFunc: PropTypes.func.isRequired,

  // 任意类型的数据
  requiredAny: PropTypes.any.isRequired,

};
PropTypes也提供自定义验证器的能力:
// 你也可以指定一个自定义验证器。它应该在验证失败时返回
  // 一个 Error 对象而不是 `console.warn` 或抛出异常。
  // 不过在 `oneOfType` 中它不起作用。
  customProp: function(props, propName, componentName) {
    if (!/matchme/.test(props[propName])) {
      return new Error(
        'Invalid prop `' + propName + '` supplied to' +
        ' `' + componentName + '`. Validation failed.'
      );
    }
  },

  // 不过你可以提供一个自定义的 `arrayOf` 或 `objectOf`
  // 验证器,它应该在验证失败时返回一个 Error 对象。 它被用
  // 于验证数组或对象的每个值。验证器前两个参数的第一个是数组
  // 或对象本身,第二个是它们对应的键。
  customArrayProp: PropTypes.arrayOf(function(propValue, key, componentName, location, propFullName) {
    if (!/matchme/.test(propValue[key])) {
      return new Error(
        'Invalid prop `' + propFullName + '` supplied to' +
        ' `' + componentName + '`. Validation failed.'
      );
    }
  })
同时可以通过配置 defaultProps 为 props定义默认值:
class Welcome extends React.Component {
  render() {
    return (
      <h1>Hello, {this.props.name}</h1>
    );
  }
}

// 为属性指定默认值:
Welcome.defaultProps = {
  name: 'Stranger'
};

// 渲染 "Hello, Stranger":
ReactDOM.render(
  <Welcome />,
  document.getElementById('example')
);